在靠写 txt 和 uptime bot 来记录统计数据和监测服务可用性一年后,终于趁着这次 docker 化服务的时候下定决心用一套像样的监控系统。
选定的方案:
- Grafana 用于可视化数据
- Graphite 用于汇总数据
- collectd 用来收集系统/apache数据
- statsd 用来收集自定义服务数据
数据结构图: statsd, collectd -> graphite -> grafana
以上框架均使用docker部署(如果可用的话)
1. 部署 graphite 用来汇总数据
graphite 还是很好配置的,直接使用现成的 docker 镜像即可,里面还自带了 statsd:graphite-project/docker-graphite-statsd。
比较坑的地方是给 graphite 的 dashboard 添加密码,官方的那个镜像好像默认是不支持密码保护的。除了换用 sitespeedio/docker-graphite-statsd 的 fork 就只能手动给 nginx 添加密码了,最好的方法当然是自己 fork 一个改一下,偷懒的方法如下:
docker exec -it graphite bash进入 container 的 bashvim /etc/nginx/.htpasswd添加用户名和密码(可以用在线生成器或者htpasswd工具生成)。vim /etc/nginx/sites-enabled/graphite-statsd.conf在location /块中添加以下两行auth_basic “Auth needed”; auth_basic_user_file /etc/nginx/.htpasswd;
nginx -s reload使修改生效最后别忘了修改网页控制台的root密码
Update the default Django admin user account. The default is insecure. username: root password: root email: root.graphite@mailinator.com First login at: http://localhost/account/login Then update the root user’s > profile at: http://localhost/admin/auth/user/1/
2. 部署 Grafana 用于可视化数据
送分题,看官方 docker 教程即可。 例子:
docker run \
  -d \
  -p 3000:3000 \
  --name=grafana \
  -e "GF_INSTALL_PLUGINS=grafana-piechart-panel" \
  grafana/grafana
3. collectd 用来收集系统/apache数据
collectd 可以在 host 和 container 里安装
先预先改好 collectd.conf 文件,要改的地方主要是Hostname,LoadPlugin write_graphite, write_graphite 块的配置。我在这里还额外开启了 apache 插件来监测 apache 数据(修改LoadPlugin apache和 apache 块的配置)。
然后在 Dockerfile 里添加:
RUN apt-get install -q -y collectd
ARG HOSTNAME_PLACEHOLDER
ARG GRAPHITE_HOST
COPY conf/collectd.conf /etc/collectd/collectd.conf
RUN sed -i "s/HOSTNAME_PLACEHOLDER/${NAME}/g" /etc/collectd/collectd.conf
RUN sed -i "s/GRAPHITE_HOST_PLACEHOLDER/${GRAPHITE_HOST}/g" /etc/collectd/collectd.conf
比较坑的一点是 collectd 服务默认是不启动的,所以要手动指定一下:
CMD service collectd start && apache2-foreground
此外,如果选择监测 apache 的话,还需要额外对 apache 进行配置 (只允许localhost访问):
RUN echo "ExtendedStatus on" >> /etc/apache2/apache2.conf &&\
    echo "<Location /mod_status>" >> /etc/apache2/apache2.conf &&\
    echo "  SetHandler server-status" >> /etc/apache2/apache2.conf &&\
    echo "  Deny from all" >> /etc/apache2/apache2.conf &&\
    echo "  Allow from localhost ip6-localhost" >> /etc/apache2/apache2.conf &&\
    echo "</Location>" >> /etc/apache2/apache2.conf
4. 部署 statsd 用来收集自定义服务数据
实际上 statsd 已经在部署 graphite 的时候一起部署过了,这里做的实际上是配置服务来提交数据。
由于我的服务是 php 写的,所以我是直接选用的 domnikl/statsd-php 框架来进行整合。
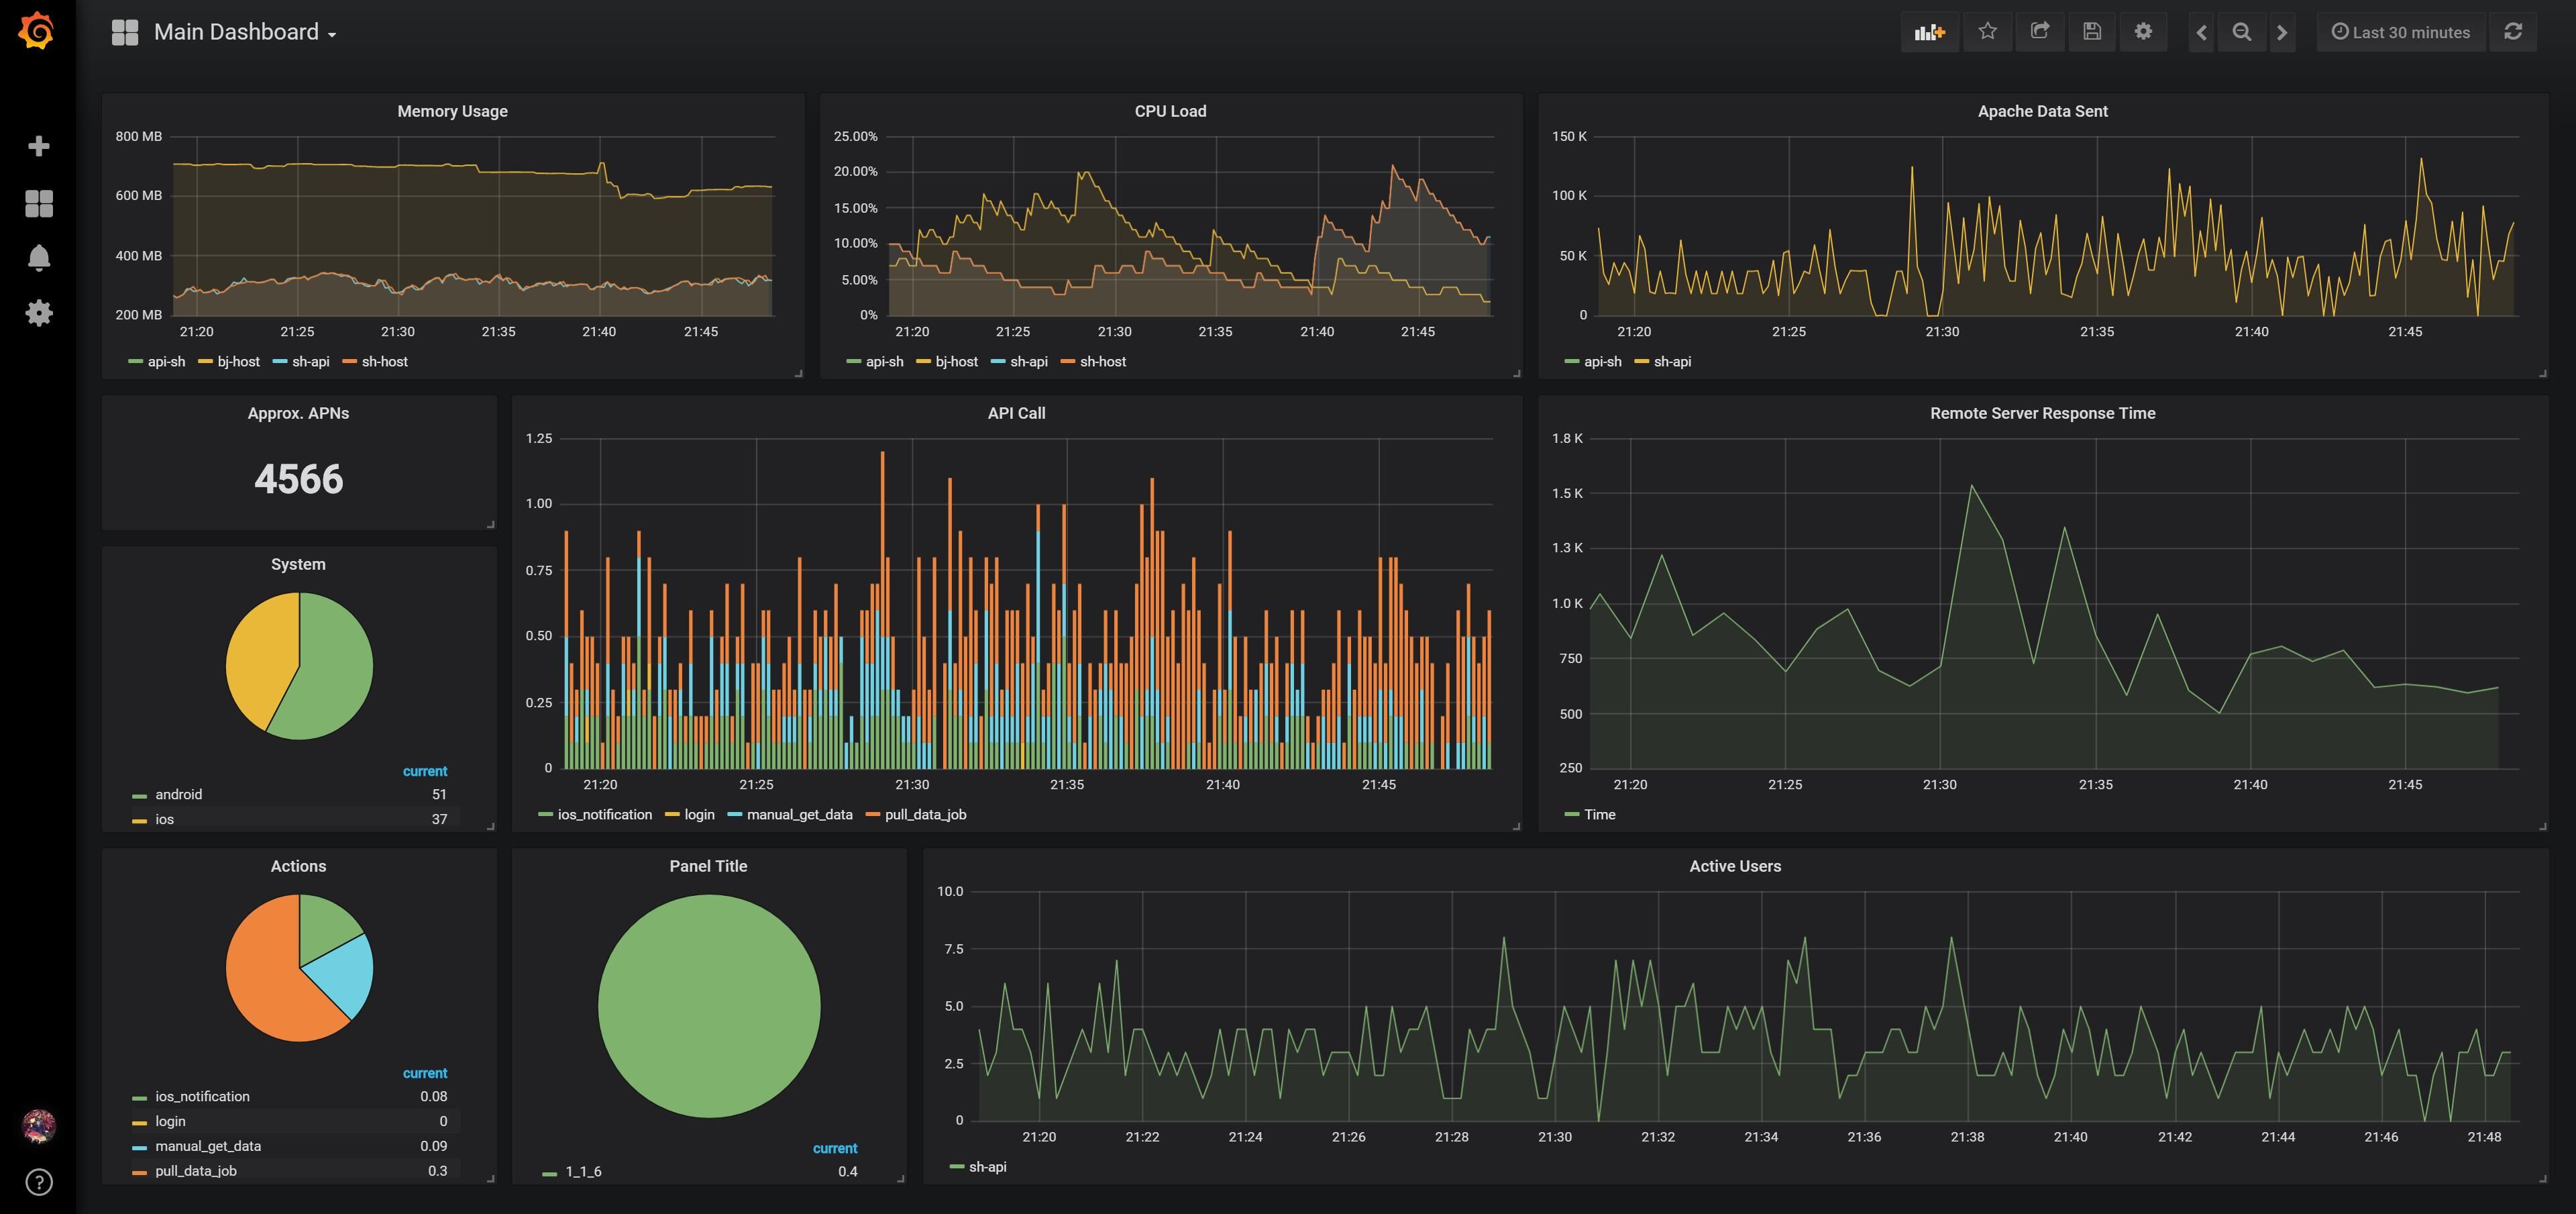
5. 搭建 Dashboard
终于到最后一步辣。打开之前部署的 Grafana 控制台然后根据自己的需求添加数据源和图表,打造炫酷的 Dashboard(尽管用户看不到)。
别忘了修改 Grafana 的密码哦。
最终成品图: